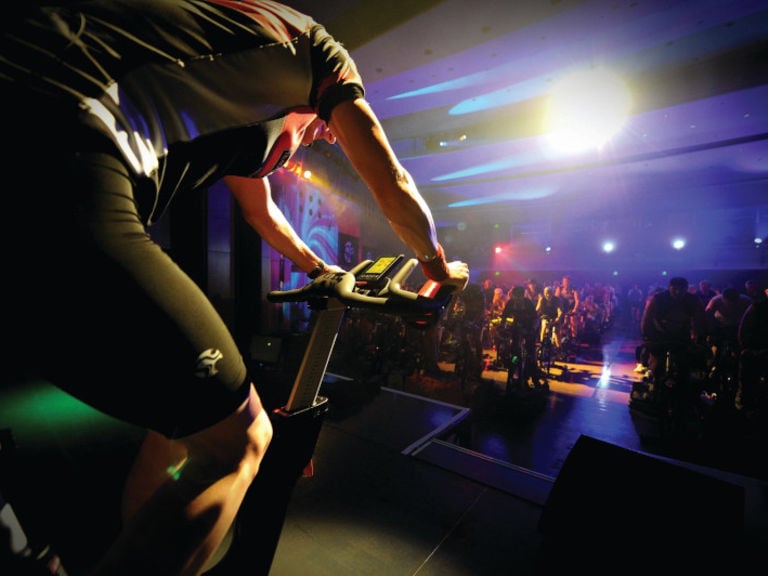
Glutes do a lot of the heavy lifting — literally. These muscles stabilise the hips, power the stride and influence how the body moves under load. When glutes are underutilised, the body often compensates, which can lead to poor posture or back pain. Prioritising these muscles builds functional strength that carries over into everything from heavy lifting to daily activities like climbing stairs.
Achieving effective muscle engagement requires understanding specific movement patterns and utilising the right equipment. This guide explores the science behind glute exercises and how to choose the right movements for a strength-focused environment.
The gluteus maximus is the biggest and strongest muscle in the human body. It acts like a powerful motor that helps the hips move and keeps the body standing tall. This muscle is the main reason people can run fast, jump high and stay stable while moving. The best gluteus maximus exercises work by loading the hips as they move back and forth.
When a heavy load is added to these movements, the muscle fibers have to work harder. This process helps the muscles grow stronger and look more defined over time. Because of how the human skeleton is built, specific movements place most of the effort on the glutes rather than the legs. These choices are effective for building power and improving balance.
Choosing the best glute workout depends on how the muscles are loaded and on the equipment available. The following movements are widely considered good glute exercises for building strength.
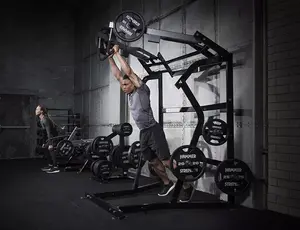
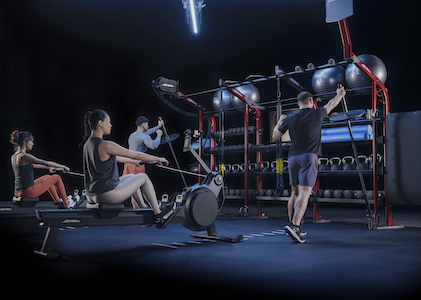
In a professional gym setting, a glute workout is often structured around a hierarchy of movements. This usually begins with a primary heavy lift, such as a hip thrust or RDL. It is often followed by cable-based isolation work like kickbacks. It may finish with machine-based abductions or walking lunges. This progression allows the muscles to be challenged through different planes of motion and resistance profiles.
One of the benefits of glute-focused training is that it works for everyone. Beginners often find using pin-loaded machines, such as the leg press or dedicated abduction units, a strong start. These provide a fixed path of motion. As stability improves, they transition to free weights and cable stations that allow for a wider range of motion and greater intensity.
Get more out of your glute workouts with equipment for focused strength training. Life Fitness offers free weights, cable stations and dedicated glute machines. With durable options across the Hammer Strength glute ranges, commercial and home gyms can create a training setup that targets glutes. Explore the range or call us for tailored advice on outfitting your gym for results.
The dumbbell chest press is one of the most recognised upper-body exercises in gyms, studios and home training spaces. But while it’s simple in concept, the details should not be overlooked. Good form supports control, comfort and consistency, while a poor one can place unnecessary strain on the shoulders or wrists.
Below, we break down how to do a chest press with dumbbells step by step, including key safety notes.
A dumbbell chest press is a resistance exercise performed by pressing two dumbbells away from the body while lying on a flat bench (or sometimes the floor). The movement primarily involves the chest muscles, with support from the front of the shoulders and the triceps.
People often choose dumbbells because each arm works independently, which can help create a more balanced pressing motion. Dumbbells also allow a natural hand position compared to some fixed-path equipment.
The American College of Sports Medicine (ACSM) recognises resistance training like this as an important part of a well-rounded fitness routine, particularly when performed with safe technique and appropriate loading.
Before practising how to do chest presses with dumbbells, you need a stable surface and appropriate weights. You will need:
If you’re building a home gym setup, having quality dumbbells and a secure bench supports a safer setup and more consistent movement. You can browse Life Fitness Australia’s home dumbbells and racks range for durable, clearly marked weights designed for long-term use.
Start by sitting on the end of the bench with a dumbbell resting on each thigh. Keep your feet flat on the floor. Once you are ready, carefully lean back onto the bench while guiding the dumbbells up into position.
Your setup should include:
When ready, hold the dumbbells above your chest with your arms extended but not locked out. Your palms can face forward or slightly inward, depending on comfort. Your elbows should sit slightly below the dumbbells, creating a stable vertical line from weight to forearm.
Slowly lower both dumbbells down towards your chest. The weights should travel evenly, not unevenly or at different speeds.
Avoid dropping too quickly. A controlled lowering phase helps maximise strength, muscle growth and tendon strength while improving joint stability.
Instead of letting your elbows flare out wide, aim for a natural angle where your upper arms sit slightly away from your torso. This position often feels more comfortable for the shoulders and helps keep the press efficient, improving force production and maximising chest engagement.
Once the dumbbells reach a comfortable depth, press them back up towards the starting position. Move both dumbbells at the same time, keeping the motion steady rather than explosive. At the top, the dumbbells should return above your chest line, not above your head.
After your final repetition, bring the dumbbells down to your thighs while seated up. This is safer than trying to stand while holding the weights away from your body.
While the dumbbell chest press is widely used, it may not be appropriate for everyone in every situation.
If you have shoulder pain, a recent injury, a medical condition affecting your upper body or any discomfort during pressing movements, it’s a good idea to speak with a qualified health professional or exercise professional before attempting this exercise.
Stop immediately if you feel sharp pain, tingling, numbness, dizziness or instability. Remember, correct form and controlled movement during strength training can significantly reduce injury risk.
When performed with correct technique, resistance training can support fat loss, build strength and improve muscle tone. However, poor form or unstable equipment can limit results and increase the risk of strain or injury.
The dumbbell chest press is a clear example. The movement itself is straightforward, but outcomes depend on setup, control and the quality of the equipment being used. A stable bench, well-balanced dumbbells and a safe training environment are all crucial in creating a better pressing experience.
If you’re planning a new home setup or upgrading an existing space, contact Life Fitness Australia to discuss equipment options and find the right solution for your environment.
If you’ve ever stepped up to a bench press station and wondered what the bar actually weighs, you’re not alone. Many lifters assume every bar is the same, but they can vary depending on the equipment type, brand and whether you’re using a standard Olympic bar, a fixed barbell or a Smith machine.
Below is a clear breakdown of how much a bench press bar weighs in most gyms, along with the key differences that affect total load.
In most commercial gyms, the most common bench press bar weighs 20 kg. This is often referred to as a “45 lb bar” because 20 kg is approximately 44 lbs, and many people round it up.
However, not every barbell on a gym floor is the same weight. Some are lighter, some are shorter and some are designed for different lifting styles. For accuracy, the best option is always to check the markings on the end of the bar.
Bench press stations can feature several different types of barbells. Knowing which one you’re using is the key to understanding the actual weight you’re lifting.
The most common bar used for bench press in commercial gyms is the men’s Olympic barbell, which weighs 20 kg. This weight is also recognised as the standard for men’s Olympic weightlifting equipment.
Some gyms provide women’s Olympic barbells, which weigh 15 kg. These bars are often slightly shorter and have a narrower grip diameter, which can make them more comfortable for some users.
Even though it’s called a “women’s bar”, it is not exclusive to women. Many facilities stock these bars to offer more options for different lifters.
Fixed barbells are pre-loaded bars commonly stored on racks with set weight increments. These bars can be useful for fast transitions and circuit-style training.
Their weight varies, and it is usually clearly displayed on the end cap. If you’re using a fixed barbell for bench press, the only reliable method is to read the label.
Some gyms and training facilities provide lighter bars designed for technique work. These are often used in coaching environments or for beginners who are building confidence with barbell control.
Common examples include 10 kg or 15 kg bars, but the weight depends on the brand and intended use.
Smith machines are popular in some gyms because the bar moves along fixed rails. However, a Smith machine’s bar weight of 6.8-11.3 kg is not standardised across models.
Some Smith machines use a counterbalance mechanism that changes the effective resistance you feel through the range of motion, while others do not. That means the starting resistance can vary between machines, and it may not match a free Olympic barbell.
In most commercial gyms, people are usually referring to the bar itself when they ask how much a normal bench press bar weighs. In competition settings, the calculation is more specific. Collars are part of the standard load and are included in official totals.
For example, the International Powerlifting Federation (IPF) technical rules specify that the bar and collars together must weight 25kg. This is important because it means competition totals are not based on plates alone. Collars contribute real weight and can affect what is recorded on the platform.
The simplest way to avoid guessing is to identify the bar before you start lifting.
Here are a few reliable checks:
If you cannot confirm the bar weight, it is safer to treat it as unknown rather than assuming it is 20 kg.
To restate, most “normal” bench press bars in commercial gyms are 20 kg, but there are plenty of exceptions, like women’s Olympic bars, fixed bars and Smith machines.
If you’re fitting out a facility, the easiest way to create confidence on the gym floor is to pair clearly specified barbells with commercial benches designed for stability and heavy use.
Browse our range of commercial benches to build out a bench press zone that feels consistent session after session. Need help selecting the right benches for your space and member mix? Speak to our team today.
Glutes do a lot of the heavy lifting. They stabilise your hips, power your stride and influence how your body moves under load. Weak glutes? That’s often where compensation, poor posture and even back pain begin. Training them builds strength that carries over into everything from lifting and sprinting to simply walking up stairs with control.
The most effective glute exercises involve specific movement patterns, full muscle engagement and smart progression. This guide breaks down the best glute workouts to help you get stronger, move better and train with purpose.
A good glute workout includes exercises that target all three gluteal muscles: the gluteus maximus, gluteus medius and gluteus minimus. Compound movements like squats and hip thrusts train the glutes under load, while accessory exercises like kickbacks and abductions help improve muscle activation and shape.
The gluteus maximus is the largest and most powerful muscle in the gluteal group. It plays a key role in hip extension, posture and explosive movements. The following glute exercises are particularly effective for building strength and size in the gluteus maximus:
1. Barbell hip thrusts — This movement produces high levels of glute activation while reducing stress on the lower back. Use a bench and a padded barbell. Drive through your heels, extend the hips fully and pause at the top to maximise contraction.
2. Romanian deadlifts — A compound lift that targets both the glutes and hamstrings. Hinge at the hips with a slight knee bend, keep the bar close to your body and maintain tension throughout the movement.
3. Bulgarian split squats — These single-leg squats challenge balance and stability while placing a high load on each glute. Holding dumbbells by your sides increases intensity without compromising form.
The gluteus medius and minimus are smaller muscles located on the outer surface of the pelvis. They stabilise the hips, support proper alignment and control lateral movement. Good glute exercises also involve these smaller muscles to improve balance and prevent injuries, particularly during dynamic or single-leg exercises.
4. Lateral band walks — With a resistance band placed just above your knees, take small, controlled steps to the side. Keep your feet wide enough to maintain tension and activate the glutes throughout the set.
5. Single-leg Romanian deadlifts — This variation targets the same muscles as the standard RDL, but introduces instability, making the glute medius work harder to keep you balanced.
6. Side-lying leg raises — A simple but effective isolation movement. Lie on your side and lift your top leg with control. For added resistance, use ankle weights or a mini band.
Absolutely. If you’re new to strength training, bodyweight glute bridges, step-ups and resistance band abductions are excellent starting points. These exercises promote glute activation, teach proper mechanics and help reduce risk of injury. If you’re unsure how to get started, consider training on pin-loaded selectorised machines like leg presses, glute kickbacks or abduction units.
Get more out of your glute workouts with equipment for focused strength training. Life Fitness offers free weights, cable stations and dedicated hip and glute machines. With durable options across the Insignia and Hammer Strength ranges, commercial and home gyms can create a training setup that targets glutes. Explore the range or call us for tailored advice on outfitting your gym for results.
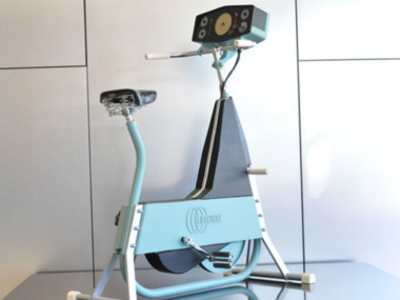
Recumbent bikes are a staple in both home and commercial gyms thanks to their low-impact design and back-supportive seating. They help improve cardiovascular health and strengthen the lower body, but does a recumbent bike work the inner thighs too?
Let’s take a closer look at how these bikes engage different muscle groups, including the adductors (inner thigh muscles) and how to optimise your training for better results.
A recumbent bike primarily targets the quadriceps, hamstrings, glutes and calf muscles. The seated and reclined position changes the angle of engagement compared to an upright bike. This puts more emphasis on the glutes and hamstrings, especially during the push phase of each pedal stroke.
However, does a recumbent bike work inner thigh muscles as well? To some extent, yes, but not in isolation.
While a recumbent bike doesn’t directly isolate the adductors (your inner thigh muscles), it does engage them as stabilisers. These muscles assist in keeping your legs aligned during each pedal stroke, especially when resistance levels are increased. If you’re pedalling with proper form and moderate resistance, your inner thighs are active but not maximally challenged.
Does a recumbent bike work the inner thighs enough for toning or strengthening? The effect is mild compared to exercises that directly target the adductors, like side-lying leg lifts or using a hip adduction machine. Still, consistent recumbent biking can support inner thigh conditioning as part of a broader lower-body routine.
To engage your inner thighs more effectively during a recumbent bike workout, try the following strategies:
Though these adjustments won’t turn the recumbent bike into a targeted inner thigh machine, they will help make your sessions more effective for overall lower-body strength.
Recumbent bikes are especially useful for beginners or those recovering from injury. The seat provides full lumbar support, and the step-through design makes it easier to mount and dismount. Does a recumbent bike work inner thigh muscles? Maybe not so much, but for beginners also looking for safe and accessible options to improve lower-body mobility and endurance, these bikes are a good starting point.
Try pairing recumbent bike workouts with targeted strength exercises like bodyweight squats or resistance band adductor pulls to round out your leg training. Lateral leg raises, glute bridges and inner thigh squeezes with a Pilates ball can also help strengthen supporting muscles that the bike may not fully activate.
If you’re building a gym setup that prioritises comfort, safety and performance, a recumbent bike is a smart addition. Life Fitness offers a range of commercial-grade and home-use recumbent bikes with ergonomic design, intuitive resistance controls and real-time workout tracking.
Looking to target more muscle groups? Pair your cardio equipment with leg press machines, hip adduction stations or cable attachments that offer greater inner thigh engagement. Explore the full Life Fitness range online or contact our team to find the right setup for your training goals.
Setting up a home gym can be a smart move — but before you start browsing squat racks and treadmills, there’s one important question to answer: how big does a home gym need to be? The right size depends on your training style, equipment choices and available space. But no matter what you’re working with, there’s a layout that can work.
For a simple setup with a bench, dumbbells and a yoga mat, your home gym doesn’t need much space at all. A clear area of 3 to 4 square metres is often enough for bodyweight exercises, light strength work and mobility sessions. If you’re tight on room, even a spare corner or a space under the stairs can work, as long as you have enough clearance to move freely.
If your goal is general fitness, the size of your home gym depends more on your routine than square footage. Choose compact and multi-functional gear that offers variety without taking over the room.
If you plan to lift heavy or install larger equipment like a squat rack or cable machine, you’ll need more room. For strength-focused home gyms, a minimum of 6 to 10 square metres is ideal. This allows space for barbells, bumper plates and machines like leg presses or chest presses. You’ll also need room to move around them safely.
Squat racks typically require at least 2.5m x 1.5m of floor space and at least 2.4m of ceiling height, especially if you’re doing overhead presses or pull-ups. A bit of extra room around the rack also allows for spotters or mat work between sets.
Commercial gym equipment is often larger, heavier and more rigid than home-use versions. A full-size plate loaded machine or commercial cable unit can weigh hundreds of kilograms and take up considerable space. In most cases, you’ll need a dedicated room or garage with reinforced flooring and clear walkways around the equipment to use it safely and comfortably.
For most home gym setups, a ceiling height of 2.4 metres (around 8 feet) is the recommended minimum. This gives enough clearance for exercises like shoulder presses and pull-ups without making the space feel cramped. If you’re planning to install a power rack or use cardio machines with elevation, like treadmills or ellipticals, double-check the equipment height specs plus user height in motion to avoid ceiling clearance issues.
Low ceiling? Focus on compact, floor-based equipment or opt for adjustable benches and dumbbells instead of standing machines.
Measure your available space and consider your training priorities. If strength is the focus, look for a compact rack and barbell with rubber plates. If cardio is your priority, consider a treadmill or cross-trainer with a smaller footprint. Many home gym machines now come with foldable designs or built-in storage to maximise small spaces.
It’s also worth thinking ahead. Will you be training alone, or with others? Do you need space for bodyweight exercises, stretching or mobility work? Answering these questions early helps avoid overcrowding and keeps your home gym functional.
How big does a home gym need to be? Ultimately, it depends on how you want to use it, your goals and your budget. No matter your answer, Life Fitness offers versatile home gym equipment that adapts to your space. From compact cardio machines to space-saving benches and barbell racks, you’ll find high-performance gear for small rooms, garage gyms or full-scale training setups.
Prefer commercial-grade strength? Explore premium machines from Life Fitness, Hammer Strength and Team ICG — including treadmills, cable stations and squat racks built to handle serious sessions. Explore our full range online, or reach out to our team for help in choosing equipment that fits your training goals and the space you’ve got.
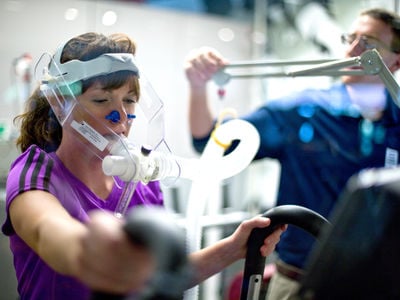
Treadmills aren’t just about moving belts anymore. With more options on the market, many fitness spaces now offer both curved and flat treadmill designs. What’s the difference — and are curved treadmills better?
This guide breaks down the key features, benefits and use cases of both to help you choose the right fit for your training style and fitness goals.
A curved treadmill is a non-motorised treadmill with a concave, curved running surface. Instead of relying on a motor to power the belt, the movement is driven entirely by your legs. As you run, the belt moves in response to your stride, speed and positioning on the curve.
This self-powered design means there’s no speed setting — your pace is 100% under your control. It also makes curved treadmills ideal for high-intensity workouts, sprint training and users looking to build running efficiency.
In the comparison between curved treadmill vs regular treadmill, the key difference lies in mechanics. Flat treadmills (or regular treadmills) use a motor to drive the belt at a consistent and adjustable speed. They’re excellent for controlled pace runs, endurance training and indoor walking. Most models include shock absorption, incline features and digital performance tracking.
Curved treadmills, on the other hand, do not use motors. They require more energy output from the user and adapt instantly to changes in pace, making them better suited for interval or sprint training.
There are several curved treadmill advantages to consider:
It depends on your training goals. If you’re focused on sprinting, high-intensity intervals or improving running mechanics, curved treadmills offer a unique advantage. They’re harder to run on, but that challenge can translate to greater fitness gains in less time.
In contrast, flat treadmills are ideal for steady-state cardio, incline walking or tracking consistent pace over long distances. They’re often more beginner-friendly and offer built-in programs, entertainment options and detailed performance data.
When considering curved treadmills vs regular treadmills, the answer isn’t about which is better overall, but about what suits your needs better.
Curved treadmills can be used by beginners, but they do have a steeper learning curve. Unlike motorised machines, curved models are self-powered. There’s no preset pace to guide you, which often leads to a steeper learning curve. In the curved treadmill vs treadmills with flat deck debate, flat machines tend to feel more intuitive for beginners. They offer structured workouts, consistent pacing and better tracking for distance and speed.
That said, beginners can absolutely benefit from curved treadmills with the right guidance. Start with short sessions, focus on form and gradually increase duration. The payoff is improved strength, balance and a better connection to your stride.
Life Fitness offers a wide range of treadmills for every training style. Our flat treadmills feature FlexDeck® cushioning, immersive digital consoles and reliable motors for commercial performance. For more advanced or performance-focused facilities, we also offer curved treadmill options that challenge your form, power, and pace.
Looking to compare curved treadmills vs flat models for your gym or training centre? Contact our team to explore premium treadmill options from Life Fitness and Hammer Strength. We’ll help you choose the right treadmills to support your home gym or your members.
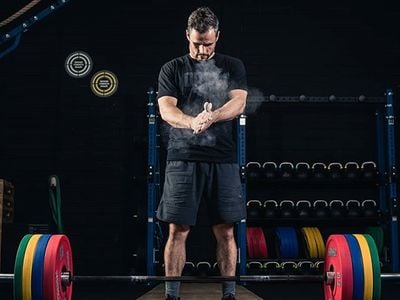
Not every strength session needs machines or cables. Sometimes, all you need is a barbell, a dumbbell or a kettlebell — and the right technique. Free weight training is simple in theory, but highly effective in practice. It’s the foundation of many strength programs, used everywhere from high-performance facilities to home garages.
Free weight training is a foundational method of strength training that uses equipment not attached to a machine. This includes dumbbells, barbells, kettlebells and weight plates. Unlike fixed-path gym machines, free weights allow for natural movement in all directions, which means your muscles do the stabilising and not the machine.
This style of training is used across all fitness levels, from beginners to elite athletes. It supports muscle growth, improves coordination and builds functional strength that carries over to everyday movement and sport performance.
Free weights work by applying external resistance that your body must control throughout the entire movement. For example, when performing a dumbbell shoulder press, you’re pushing the weight up while stabilising your joints, controlling the descent and engaging your core for balance.
Because free weights require balance and coordination, multiple muscle groups are typically recruited during a single movement. This makes free weight exercises efficient and highly transferable to real-life strength demands.
Free weights might look simple, but don’t let that fool you — they’re among the most versatile and rewarding tools in any strength setup. What are free weight training’s benefits compared to machines or cable systems? The answer lies in the freedom to move, adapt and progress on your own terms.
Yes, with proper instruction and controlled progression, free weight training is beginner-friendly. Start with lighter weights and focus on mastering form before increasing resistance. If you’re wondering what free weight training is for beginners, it’s about building confidence with fundamental movement patterns using simple tools like dumbbells or kettlebells. These allow you to perform foundational exercises such as squats, lunges and presses before progressing to heavier barbell lifts.
At a minimum, you need dumbbells or kettlebells in a variety of weights. For more advanced routines, consider:
Free weight training setups can be simple or expansive, depending on your space, goals, and training style.
Create a strength space that works hard every day with Life Fitness commercial-grade free weights. Find dumbbells, barbells, plates, benches and racks that support serious lifting, smooth transitions between movements and high-frequency use in busy environments. Our range also extends across Hammer Strength, Axiom and Insignia, with flexibility in design, function and footprint. Outfit your gym with equipment trusted by performance centres and health clubs around the world.
Browse the full lineup online, or contact our team to plan a free weight setup tailored to your floor plan and training style.
Treadmill workouts and weight training both offer serious benefits. But combining them in a single session raises a common question: Should I do treadmill before or after weights? The answer depends on your goals — and how you want your body to perform, adapt and recover.
The right order depends on your training goals. A short treadmill session at a light pace — 5 to 10 minutes — is often best used as a warm-up before lifting weights. It helps increase your heart rate, loosen up your muscles and mentally prepare for your workout without draining your energy.
If you’re using the treadmill as a full cardio workout, though, it’s worth thinking about how it affects the rest of your session. Extended runs can fatigue the legs and impact your performance on strength movements like squats or deadlifts. That’s why many people time their treadmill workouts around what they want to prioritise most — whether that’s endurance, strength or fat loss.
If your primary goal is fat loss or improving body composition, starting with the treadmill can help you burn more calories earlier in the session. Doing cardio first taps into energy stores while you’re still fresh, which may support a higher overall calorie burn.
That said, there’s also a case for doing weights first. Strength training builds lean muscle, which can improve your metabolism over time. By lifting first, you’ll have more energy to push through heavier sets. You can then finish with cardio to further increase your energy output and support fat loss.
So if you’re asking, “Should I do treadmill before or after weights” to support weight loss, it depends on your focus: immediate calorie burn or long-term muscle gain. For balanced results, some exercisers rotate the order across different days or training blocks.
Strength training is most effective when performed at the start of your session, before fatigue sets in. If you’re lifting for performance or muscle growth, doing the treadmill afterward helps preserve energy for compound lifts like squats, bench presses or rows.
Post-lift cardio — especially low-impact treadmill walking — can support recovery, increase aerobic capacity and encourage circulation without interfering with your strength work. If you’re focused on building strength, this sequencing helps prioritise power while still including cardiovascular training.
In short, if strength is your goal, start with the barbell. Let cardio complement, not compete with, your lifting efforts.
Avoid overlap: If you’re doing leg weights, keep treadmill sessions light or separate by time.
If you’re unsure where to begin, consider training on alternate days — one day for strength, the next for cardio — until you learn how your body responds to both in a single session.
No matter how you structure your workouts, the right tools help you train smarter. Life Fitness treadmills are suitable for everything from light warm-ups to intense post-lift conditioning, with FlexDeck® cushioning to reduce joint impact and digital features to track your performance in real time.
Looking to combine cardio with strength? Life Fitness also offers free weights, benches, racks and cable machines built for both home and commercial use. Check out our products or get in touch with a Life Fitness consultant to build a setup that fits your space and training style.
Training for a marathon is a big commitment but more than achievable with the right plan and mindset. If you’ve asked how to train for a marathon, you’re not the only one. It’s one of the most common goals for runners looking to push themselves. This guide will walk you through what to expect, how to approach your training without burning out and how to prepare your body and mind for the challenge.
The key to successful marathon training is consistency and progression. Start by building a weekly routine that includes:
Your long runs will gradually increase in distance over time. These runs build the endurance you need to complete 42.2 km on race day. During the week, you’ll also mix in shorter recovery runs, tempo runs (to improve pace) and easy runs to maintain consistency without overtraining.
It’s a good idea to follow a training plan designed by a running coach or health professional — especially if this is your first marathon. Avoid copying someone else’s routine without adapting it to your own fitness level.
How long it takes to train for a marathon depends on your starting point. Most beginner programs run for 16 to 20 weeks. If you’ve already built a base of regular running, you might be able to train in a shorter timeframe. But if you’re starting from scratch, allow closer to five months. Longer training programs allow for more gradual progress and lower risk of injury.
Marathon training is demanding, but overtraining can undo all your progress. To avoid it:
Include mobility work, stretching and enough sleep in your weekly plan. Training harder doesn’t always mean better results. Training smarter does.
Aside from running and recovery, prepare for other elements of the marathon experience:
If you’re still asking how to train to run a marathon, the answer is: by doing the small things consistently. You don’t need to run fast all the time, but you do need to keep showing up.
Treadmill training gives you control over pace, incline and distance. It’s an effective part of how to train for a marathon, especially when outdoor conditions aren’t ideal. Life Fitness treadmills are built for long-distance performance, with FlexDeck® shock absorption to reduce joint impact and help you maintain good form through every stride. Track speed, cadence and heart rate in real time with digital consoles designed to support structured training blocks.
Log recovery kilometres and simulate race pace. These treadmills help you stay consistent and focused from your first training week to race day. Explore the Life Fitness treadmill range online or speak with our team to find the right fit for your marathon goals.